2012/12/24
2012/12/19
A LOT of OSL Shaders !
Here is a very valuable compilation of OSL Shaders.
It is more than useful for anyone using OSL !
You could find very simple shaders up to very complex texture generators.
Have a look here : OSL Shaders
Have a nice shading day !
2012/12/16
OSL Dispersion Refractive Shader
This Shader does a per wavelength Dispersion in a refractive material.
It is brut force dispersion shader and need a lot render samples to have a correct look. There is near no optimization, so it's not made for animation.
It was made for educational purpose and should be optimized and rethink for an effective production use. Indeed, results are really good for still pictures.
Small documentation :
Transp Color = Color of the transparent material.
Beware that if saturation is too high, you'll not see any dispersion.
IoR = Main Index of Refraction of material.
disp = Dispersion , in IoR Delta.
correct value are between 0.05 and 0.2.
A higher number give more rainbow in transparency, and slower rendering time.
A too high value ( > 0.3 ) can lead to rendering errors or inconsistency.
Roughness = surface roughness.
A good value is 0.0. Higher values blur refraction and could hide dispersion effect.
Full render = optimization.
1.0 = no optimization, slower render but accurate.
0.0 = no dispersion except for eye rays. You'll see no dispersion on a reflect of the object, and backface is ignored.
It is about 30% to 60% faster, and the difference between realistic and optimized material isn't noticeable for rendering that doen't need pure accuracy.
You can download the OSL Shader here : GDispersive.osl
This shader is made for educationnal purpose only. Use it in production at your own risk.
Closures are for Blender/Cycles. They could need adaptation for your renderer.
If you use this material, please credit it and me. Thank you.
Enjoy !
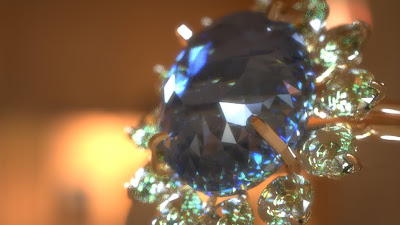
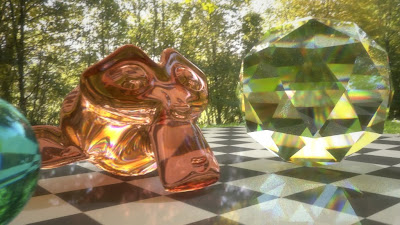
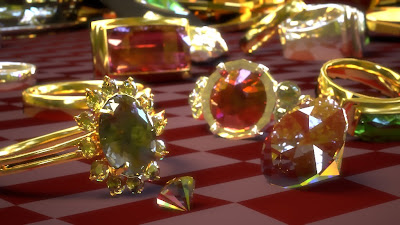
OSL Dispersion Shader from François Gastaldo on Vimeo.


2012/12/11
Enter Physically Correct Shading World, Step One
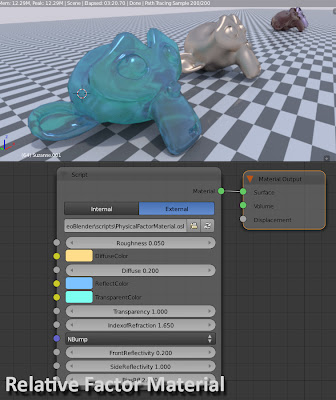
Following my conference 'Make your Own Physically Correct Shader' at Blender Conference, in Amsterdam, October 2012, here are the OSL version of Shaders.
The Conference was about how to make your own (according to your production needs) shaders and to make them Physically Correct to be sure to have a realistic lighting.
During the conference, I made Cycles nodes Shaders. Now, OSL is here and it's a very better way to make faster and cleaner Shaders.
I invit you to enter this Physically Correct World, and we will do it in few steps.
Step One : Have basic Physically Correct shaders.
Step Two : Multi-Layers Shaders.
Step Three : Getting Faster, Shader Optimization.
Step Four : Special pourpose, but still correct, Shading.
Step Five, six, seven... : ??? .... We will see !
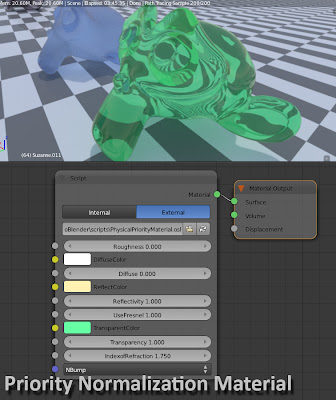
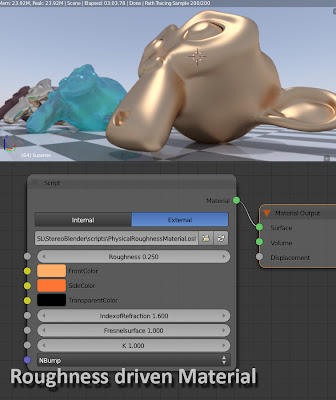
For the first step, I've made an archive with all files.
It includes :
- The PDF file of the 'Make your Own Physically Correct Shader' Conference.
- A Blender scene with Node based Shaders.
- Three OSL Shaders, each one corresponding to each Normalization Case discribed in the Conference : Priority Normalization, Factor Normalization, Roughness Driven Shading.
All OSL shaders are documented (and commented) inside the source, the .osl file. Please, read it to understand how to use them.
All this material is for Educational Purpose. You can use it for teaching or self-teaching.
You can download the First Step to Physical World here : Blender Conference 2012 Physically Correct Shaders + OSL
Physically Correct Shading, Step One from François Gastaldo on Vimeo.
2012/12/06
Simple OSL Ambient Occlusion
Just because I need one, and also because the AO node in Blender is a little too light, I've made today an Ambient Occlusion Shader with OSL.
It works exactely like a standard Ambient Occlusion, as you could find it in many software.
It works with with colors as well as with Closure.
if you connect use just the ' ColorIn ' or just the ' closureIn ' inputs and connect nothing to 'ColorHit' or 'closureHit'. Then Occlusion will be black.
AO Angle is in RADIANS, 1.0 = 180° AO search.
Maxdistance limit distance of occluding objects.
If you want to not have a distance limit, 0.0 is not infinity. You'll have to enter a very big distance.
This AO shaders needs polygons to be correctely oriented.
You can download it here : OSL Ambient Occlusion
Enjoy !
ADDEDUM : GAO and GAO2 are updated ! Click here to see the new versions GAO1.1 and GAO2.1 !


2012/11/27
Image 2 Screen shader
I've made a Raster Screen Simulator Shader for a project made with Autodesk Softimage.
I also started an Open shading Language, useable with Blender/Cycles and any other OSL renderer. (I'm impatient to try it with VRay or Arnold). It is the first version, and it has less fonctionalities than the Softimage Shader. I'll release full version later.
It convert any image to a pixelised version.
There is many option :
- Pixel Resolution of the simulated screen.
- Color depth, for display from 3bit (8 colors) to 24bit (16M colors).
- distance visibility of gap between pixels.
- distance visibility of RGB pattern.
and, on softimage : dead pixels, non uniform color chunks and some other picture degradations.
This Shader need a raw image data, without UV. So,
in softimage :
* you need to connect blue output of the raw image node to the shader, without the 'image' node.
in Blender :
* There is no 'raw image file' node, so you need to enter, by hand, the full path of the image file of the image you want to pixelize of for the RGB pattern image.
I offer you a bunch of RGB Patterns examples. I made photgrphies of many screens using my 60mm Macro Nikkor, and I draw some myself.
See the FULL Documentation (in french, sorry) for more information.
Download :
Autodesk Softimage Shader Compound : Image 2 Screen
Full PDF Shader Documentation (in french, but illustrated)
Open shading Language (OSL) Image 2 Screen Script
RGB Patterns images
Blender / Cycles / OSL Example Scene
Enjoy it !
Here is a video of results, and some example of 'how to' use :
Image 2 Screen Shader demo from François Gastaldo on Vimeo.


2012/08/27
A nice Gear Tool
Vincent Mazeas, a friend and ex-student has just release a nice script for 3DSMax.
Just model your gears, and they will work !
You can ask Vincent for more information : Vincent Mazeas
Or just watch the video :
Just model your gears, and they will work !
You can ask Vincent for more information : Vincent Mazeas
Or just watch the video :
Gearrify from Vincent Mazéas on Vimeo.
2012/08/03
MultiLayer Physically Correct Shading in Blender
My Multi-Layer Physically Correct shading in Blender/Cycles starts to be fine for the first tests.
So, I'm trying a standard case study for multi layer : Candy Apple Paint !
I've found the recipe and 'how to' on a street-rod forum on internet, and convert it to multilayer shading : Golden Base(mid) + Dark color(thick) + Clear (thick). It works pretty well !
Of course, the work is not yet finished. I still have problems with node limitations in Blender, and it's currently working just on GPU rendering...
I'm still working on it, and it will be improved and easier to use.
There is no flakes in this paint, as the goal was not to make a perfect car paint, but to use multi layered material.
So, here are the results :


2012/08/02
Imperial Beach, juste au sud !
2012/08/01
Sur la route du culte...
2012/07/31
San diego, Hotel de Coronado
Inscription à :
Commentaires (Atom)


