
Back from two weeks far from Internet, I just discover that my Physically Correct shaders don't work anymore with lastest Blender distribution.
So, I corrected them, and now, it's ok!
Just go to Original Post about Physically Correct Shaders to download the latest version.
2013/06/24
2013/06/23
QUIP and QUIPCam fast FX shaders
I've made those two OSL shaders to have a fast and easy solution to put my 3D Objects in HDR Environment, without compositing.
QUIP is for Panoramic Camera, it's the easier to use. Just create a ground, plane or grid, and apply this shader to it. It doesn't work if the camera is moving, or with stereo camera.
QUIPCam is for Moving Camera. It's a kind of Spherical Camera Mapping to have a very fast 3D integration result. It's a first step to more advanced 3D integration or FX.
Just create a ground, plane or grid, and apply this shader to it. Then, create objects to mimic the real scene (box for building).
You can do very precise work for real FX, or just lowpoly object if you have fast or far camera moves.
It works very well with stereo camera, and could be used for 2D to 3D conversion.
Documentation :
QUIP
environment_file = the ful spherical panorama, HDRI is better. It has to be the same as the one in world environment.
gammaEnv = gamma correction of environment image. Use 1.0 or 2.2 to correct the gamma.
WhiteBalance = White balance correction. Often, the environment lighting (IBL) give a colder look.
Use this value, from 3000 to 15000, to correct the warmness or coldness of ground.
Luminance = correct the darkness or brightness of ground.
ZFade = distance to make a smooth transition to the real environment. Your ground plane should be bigger than this value.
Use it a close as you can to have very smooth (invisible) transition.
AODensity = 0.0 means No Ambient Occlusion, 1.0 = completely dark (black) Ambient Occlusion.
QUIPCam
QUIPCam has two more parameters :
Origin = Center of the Panorama. Using Z is enough, X and Y are not necessary. The bigger is Z, the bigger the Environment will be.
You may track this vector with the position of a Null Object to make it easier to use.
Pan_Rotation = Environment Rotation.
I've Include a quick tutorial after the demo video. It would help to understand how to use QUIP and QUIPCam.
You can download QUIP, and QUIPCam.
Those shaders are made for educationnal purpose only. Use them in production at your own risk.
Closures are for Blender/Cycles. They could need adaptation for your renderer.
If you use one of those shaders, or both, please credit them and me. Thank you.
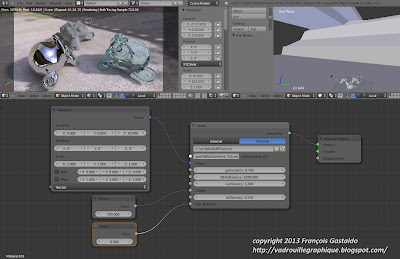
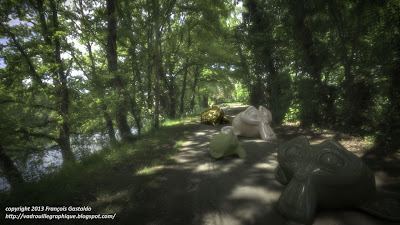
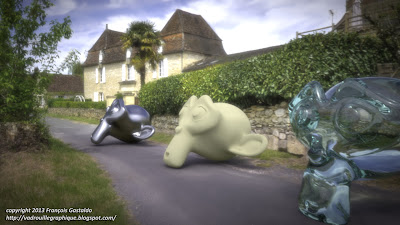
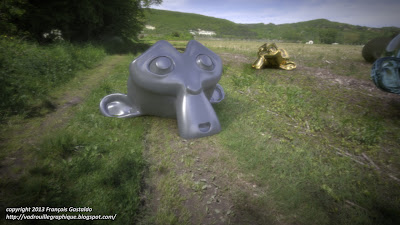
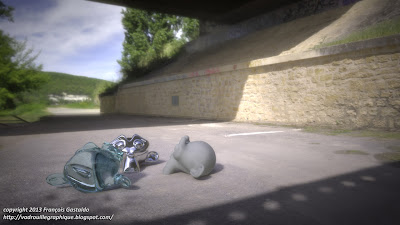
QUIP is for Panoramic Camera, it's the easier to use. Just create a ground, plane or grid, and apply this shader to it. It doesn't work if the camera is moving, or with stereo camera.
QUIPCam is for Moving Camera. It's a kind of Spherical Camera Mapping to have a very fast 3D integration result. It's a first step to more advanced 3D integration or FX.
Just create a ground, plane or grid, and apply this shader to it. Then, create objects to mimic the real scene (box for building).
You can do very precise work for real FX, or just lowpoly object if you have fast or far camera moves.
It works very well with stereo camera, and could be used for 2D to 3D conversion.
Documentation :
QUIP
environment_file = the ful spherical panorama, HDRI is better. It has to be the same as the one in world environment.
gammaEnv = gamma correction of environment image. Use 1.0 or 2.2 to correct the gamma.
WhiteBalance = White balance correction. Often, the environment lighting (IBL) give a colder look.
Use this value, from 3000 to 15000, to correct the warmness or coldness of ground.
Luminance = correct the darkness or brightness of ground.
ZFade = distance to make a smooth transition to the real environment. Your ground plane should be bigger than this value.
Use it a close as you can to have very smooth (invisible) transition.
AODensity = 0.0 means No Ambient Occlusion, 1.0 = completely dark (black) Ambient Occlusion.
QUIPCam
QUIPCam has two more parameters :
Origin = Center of the Panorama. Using Z is enough, X and Y are not necessary. The bigger is Z, the bigger the Environment will be.
You may track this vector with the position of a Null Object to make it easier to use.
Pan_Rotation = Environment Rotation.
I've Include a quick tutorial after the demo video. It would help to understand how to use QUIP and QUIPCam.
You can download QUIP, and QUIPCam.
Those shaders are made for educationnal purpose only. Use them in production at your own risk.
Closures are for Blender/Cycles. They could need adaptation for your renderer.
If you use one of those shaders, or both, please credit them and me. Thank you.
QUIP & QUIPCam OSL Shader from François Gastaldo on Vimeo.


2013/06/07
An Excellent Work using Pyla
Just a very good use of PYLA and SSS, with a wonderful model and a very nice picture :
Nana By RC
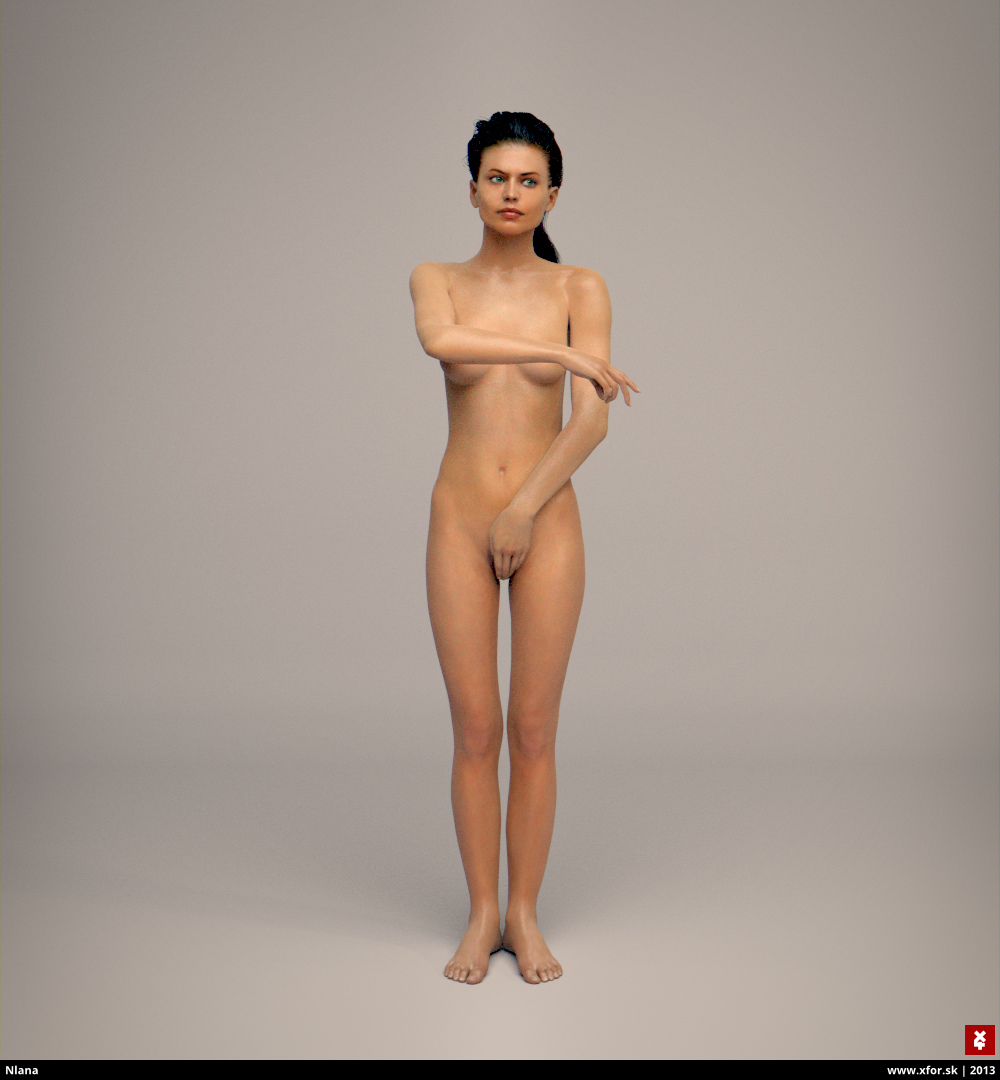
I'm currentely working on PYLA 1.2, the optimized version of Pyla. I just need to do more test rendering...
2013/06/01
PYLA Layer Shader Carbon Fiber Tutorial
Working with layers in shading is a really powerful way to obtain Physically correct and realistic materials.
Indeed, it's not so easy to know what to do with PYLA !
So, here is a simple tutorial to learn how to use it.
The example is 'How to do a Carbon Fiber Material'.
I hope it would help you to understand how to use PYLA for better shading in your project.


The fiber Texture :

Enjoy !
Indeed, it's not so easy to know what to do with PYLA !
So, here is a simple tutorial to learn how to use it.
The example is 'How to do a Carbon Fiber Material'.
I hope it would help you to understand how to use PYLA for better shading in your project.


The fiber Texture :

Enjoy !
2013/05/22
PYLA : The PhYsically correct LAyer shader
Working with layers in shading is simple and powerful.
You can design your shader exactly like the real ones : you apply a 'base', and then add layers, like colors, polish, coating, etc.
Maxwell Render is working like this for a long time. Now, Mental Ray introduces 'MILA', which also offers this way of working.
I've shown Layers in Cycles during last Blender Conference, in October 2012. So, here is PYLA, the first OSL version of my layering shader!
PYLA stands for 'PhYsically Correct LAyer Mixer'
This shader is a Physically Correct Shader Mixer for layered Materials. It simulates materials made of multiple coating, or layers, like car paint, polished nails ...
This is a very simple shader, but very powerful !
You could better manage your mixed Materials, in more realistic way, and with better results.
Download : PYLA Shader Layer with OSL
documentation :
INPUT :
Base = the base shader, the layer will come on top of it.
Layer = the layer Material.
You can use any shader, except tranparent or glass shader.
Pyla is a mixer, and not a real layer simulation, so tranparent shader should give unwanted results !
Opacity = between 0.0 and 1.0, 0.0 = no visible layer, 1.0 = full effect.
Depth = the depth of the layer.
The thikker the layer is, the less you could see the base. value between 0.0 to 10.0, good value : 2.0.
Fresnel = Fresnel visibility for the layer. a full fresnel ( 1.0 ) is perfect for clear coat simulation.
0.0 = the depth only control the visibilty, and not the fresnel effect.
IoR = The Index of Refraction for the fresnel effect. The greater it is, the more visible is the layer.
OUTPUT :
Layered (Closure) = Mixed Base and Layer Inputs.
Layer Mix (float) = amount of mixing between the base and Layer.
You can use it to put in a classical Shader Mixer, or a color mixier, as you wish!
TODO :
* Optimization for faster render.
* Transparent Layer capability.
This shader was edited with Sublime text Editor, with OSL package.
This shader is made for educationnal purpose only. Use it in production at your own risk.
Closures are for Blender/Cycles. They could need adaptation for your renderer.
If you use this shader, please credit it and me. Thank you.


You can design your shader exactly like the real ones : you apply a 'base', and then add layers, like colors, polish, coating, etc.
Maxwell Render is working like this for a long time. Now, Mental Ray introduces 'MILA', which also offers this way of working.
I've shown Layers in Cycles during last Blender Conference, in October 2012. So, here is PYLA, the first OSL version of my layering shader!
PYLA stands for 'PhYsically Correct LAyer Mixer'
This shader is a Physically Correct Shader Mixer for layered Materials. It simulates materials made of multiple coating, or layers, like car paint, polished nails ...
This is a very simple shader, but very powerful !
You could better manage your mixed Materials, in more realistic way, and with better results.
Download : PYLA Shader Layer with OSL
PYLA OSL Layer Shading from François Gastaldo on Vimeo.
documentation :
INPUT :
Base = the base shader, the layer will come on top of it.
Layer = the layer Material.
You can use any shader, except tranparent or glass shader.
Pyla is a mixer, and not a real layer simulation, so tranparent shader should give unwanted results !
Opacity = between 0.0 and 1.0, 0.0 = no visible layer, 1.0 = full effect.
Depth = the depth of the layer.
The thikker the layer is, the less you could see the base. value between 0.0 to 10.0, good value : 2.0.
Fresnel = Fresnel visibility for the layer. a full fresnel ( 1.0 ) is perfect for clear coat simulation.
0.0 = the depth only control the visibilty, and not the fresnel effect.
IoR = The Index of Refraction for the fresnel effect. The greater it is, the more visible is the layer.
OUTPUT :
Layered (Closure) = Mixed Base and Layer Inputs.
Layer Mix (float) = amount of mixing between the base and Layer.
You can use it to put in a classical Shader Mixer, or a color mixier, as you wish!
TODO :
* Optimization for faster render.
* Transparent Layer capability.
This shader was edited with Sublime text Editor, with OSL package.
This shader is made for educationnal purpose only. Use it in production at your own risk.
Closures are for Blender/Cycles. They could need adaptation for your renderer.
If you use this shader, please credit it and me. Thank you.


2013/03/08
Premiers Hologrammes !
Je vous ai souvent parlé de stéréoscopie ici, avec des Rig, des videos, etc.
Mais tout le monde sait que la seule, la vraie, la plus pure image 3D, c'est l'Holographie !
Je propose donc de découvrir cet art et même de le pratiquer dans un atelier qui aura lieu à l'Open Bidouille Camp, à Bordeaux, le 27 et 28 Avril 2013.
On fera ensemble quelques hologrammes, et vous pouvez même repartir avec votre oeuvre !
Pour plus d'info :
Atelier Holographie
Open Bidouille Camp
Pour info, ces Hologrammes sont réalisés sur plaques LitiHolo.
Le montage optique est basé sur le Starter Kit LitiHolo, un peu modifié par mes soins...
En attendant, voici mes premiers hologrammes :


Mais tout le monde sait que la seule, la vraie, la plus pure image 3D, c'est l'Holographie !
Je propose donc de découvrir cet art et même de le pratiquer dans un atelier qui aura lieu à l'Open Bidouille Camp, à Bordeaux, le 27 et 28 Avril 2013.
On fera ensemble quelques hologrammes, et vous pouvez même repartir avec votre oeuvre !
Pour plus d'info :
Atelier Holographie
Open Bidouille Camp
Pour info, ces Hologrammes sont réalisés sur plaques LitiHolo.
Le montage optique est basé sur le Starter Kit LitiHolo, un peu modifié par mes soins...
En attendant, voici mes premiers hologrammes :


2013/01/02
Happy New Year !
Happy New Year to you all !
2013 will be a great year for 3D! and if there is anyone from Autodek reading this, this year is 2013, not 2014 ...
If all goes as planned, I'll be at Siggraph 2013 in Anaheim, Blender Conf 2013 in Amsterdam ! And I'll be more than happy to see you there !
I don't have time now to use OSL, even if I love this Shading Language ! But I took a couple of hours to wish you an Happy New Year in 3D :
The Pictures are made with :
The famous EverMotion Classroom : The Classroom
The soon to be famous IRay materials : 3DSMax IRay Materials
The Very Famous Guruware Ivy generator : gwivy


2012/12/24

2012/12/19
A LOT of OSL Shaders !
Here is a very valuable compilation of OSL Shaders.
It is more than useful for anyone using OSL !
You could find very simple shaders up to very complex texture generators.
Have a look here : OSL Shaders
Have a nice shading day !
2012/12/16
OSL Dispersion Refractive Shader
This Shader does a per wavelength Dispersion in a refractive material.
It is brut force dispersion shader and need a lot render samples to have a correct look. There is near no optimization, so it's not made for animation.
It was made for educational purpose and should be optimized and rethink for an effective production use. Indeed, results are really good for still pictures.
Small documentation :
Transp Color = Color of the transparent material.
Beware that if saturation is too high, you'll not see any dispersion.
IoR = Main Index of Refraction of material.
disp = Dispersion , in IoR Delta.
correct value are between 0.05 and 0.2.
A higher number give more rainbow in transparency, and slower rendering time.
A too high value ( > 0.3 ) can lead to rendering errors or inconsistency.
Roughness = surface roughness.
A good value is 0.0. Higher values blur refraction and could hide dispersion effect.
Full render = optimization.
1.0 = no optimization, slower render but accurate.
0.0 = no dispersion except for eye rays. You'll see no dispersion on a reflect of the object, and backface is ignored.
It is about 30% to 60% faster, and the difference between realistic and optimized material isn't noticeable for rendering that doen't need pure accuracy.
You can download the OSL Shader here : GDispersive.osl
This shader is made for educationnal purpose only. Use it in production at your own risk.
Closures are for Blender/Cycles. They could need adaptation for your renderer.
If you use this material, please credit it and me. Thank you.
Enjoy !
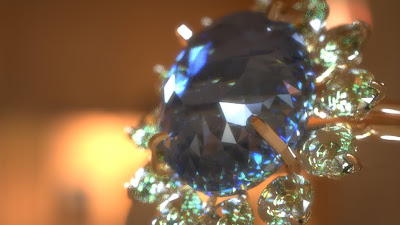
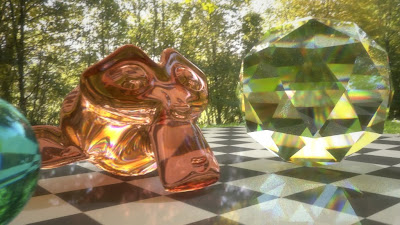
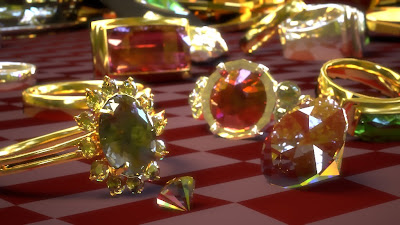
It is brut force dispersion shader and need a lot render samples to have a correct look. There is near no optimization, so it's not made for animation.
It was made for educational purpose and should be optimized and rethink for an effective production use. Indeed, results are really good for still pictures.
Small documentation :
Transp Color = Color of the transparent material.
Beware that if saturation is too high, you'll not see any dispersion.
IoR = Main Index of Refraction of material.
disp = Dispersion , in IoR Delta.
correct value are between 0.05 and 0.2.
A higher number give more rainbow in transparency, and slower rendering time.
A too high value ( > 0.3 ) can lead to rendering errors or inconsistency.
Roughness = surface roughness.
A good value is 0.0. Higher values blur refraction and could hide dispersion effect.
Full render = optimization.
1.0 = no optimization, slower render but accurate.
0.0 = no dispersion except for eye rays. You'll see no dispersion on a reflect of the object, and backface is ignored.
It is about 30% to 60% faster, and the difference between realistic and optimized material isn't noticeable for rendering that doen't need pure accuracy.
You can download the OSL Shader here : GDispersive.osl
This shader is made for educationnal purpose only. Use it in production at your own risk.
Closures are for Blender/Cycles. They could need adaptation for your renderer.
If you use this material, please credit it and me. Thank you.
Enjoy !
OSL Dispersion Shader from François Gastaldo on Vimeo.


2012/12/11
Enter Physically Correct Shading World, Step One
Following my conference 'Make your Own Physically Correct Shader' at Blender Conference, in Amsterdam, October 2012, here are the OSL version of Shaders.
The Conference was about how to make your own (according to your production needs) shaders and to make them Physically Correct to be sure to have a realistic lighting.
During the conference, I made Cycles nodes Shaders. Now, OSL is here and it's a very better way to make faster and cleaner Shaders.
I invit you to enter this Physically Correct World, and we will do it in few steps.
Step One : Have basic Physically Correct shaders.
Step Two : Multi-Layers Shaders.
Step Three : Getting Faster, Shader Optimization.
Step Four : Special pourpose, but still correct, Shading.
Step Five, six, seven... : ??? .... We will see !
For the first step, I've made an archive with all files.
It includes :
- The PDF file of the 'Make your Own Physically Correct Shader' Conference.
- A Blender scene with Node based Shaders.
- Three OSL Shaders, each one corresponding to each Normalization Case discribed in the Conference : Priority Normalization, Factor Normalization, Roughness Driven Shading.
All OSL shaders are documented (and commented) inside the source, the .osl file. Please, read it to understand how to use them.
All this material is for Educational Purpose. You can use it for teaching or self-teaching.
You can download the First Step to Physical World here : Blender Conference 2012 Physically Correct Shaders + OSL
Physically Correct Shading, Step One from François Gastaldo on Vimeo.


2012/12/06
Simple OSL Ambient Occlusion
Just because I need one, and also because the AO node in Blender is a little too light, I've made today an Ambient Occlusion Shader with OSL.
It works exactely like a standard Ambient Occlusion, as you could find it in many software.
It works with with colors as well as with Closure.
if you connect use just the ' ColorIn ' or just the ' closureIn ' inputs and connect nothing to 'ColorHit' or 'closureHit'. Then Occlusion will be black.
AO Angle is in RADIANS, 1.0 = 180° AO search.
Maxdistance limit distance of occluding objects.
If you want to not have a distance limit, 0.0 is not infinity. You'll have to enter a very big distance.
This AO shaders needs polygons to be correctely oriented.
You can download it here : OSL Ambient Occlusion
Enjoy !
ADDEDUM : GAO and GAO2 are updated ! Click here to see the new versions GAO1.1 and GAO2.1 !


It works exactely like a standard Ambient Occlusion, as you could find it in many software.
It works with with colors as well as with Closure.
if you connect use just the ' ColorIn ' or just the ' closureIn ' inputs and connect nothing to 'ColorHit' or 'closureHit'. Then Occlusion will be black.
AO Angle is in RADIANS, 1.0 = 180° AO search.
Maxdistance limit distance of occluding objects.
If you want to not have a distance limit, 0.0 is not infinity. You'll have to enter a very big distance.
This AO shaders needs polygons to be correctely oriented.
You can download it here : OSL Ambient Occlusion
Enjoy !
ADDEDUM : GAO and GAO2 are updated ! Click here to see the new versions GAO1.1 and GAO2.1 !


Inscription à :
Articles (Atom)