The goal is to make some shaders using ‘in shader sphere rendering’.
Those Open Shading Language shaders convert any object to a bunch of spheres! With them, you can have a 6 polygones cube looking like one million spheres at rendering time, with no RAM overload.
This is purely shading: no particule, no molecular nor granular plugins. Just apply the shader to your object to turn it to thousands of spheres.
The main interest of those shader is education! They are not yet Production Ready Shaders!
The speed of those shaders is not so smaller than converting object to real sphere particules.
The granular tests made with Softimage ICE are even faster! (But it is Softimage ICE… Rest In Peace Softy)
In this post, you can see the first results of FOSPHORE_FILL.
This first shader fills an object with spheres of chosen size and space.
You can randomly change size, place, color… It’s also possible to animate the noise and the spheres.
There is no limits to the number of spheres, and you could have thousands and thousands spheres in your object!
Unfortunately, the shader is not yet to be released. There are still some bugs, and some optimization is needed. I also have to make it to work correctly with VRay.
I've made a Raster Screen Simulator Shader for a project made with Autodesk Softimage.
I also started an Open shading Language, useable with Blender/Cycles and any other OSL renderer. (I'm impatient to try it with VRay or Arnold). It is the first version, and it has less fonctionalities than the Softimage Shader. I'll release full version later.
It convert any image to a pixelised version.
There is many option :
- Pixel Resolution of the simulated screen.
- Color depth, for display from 3bit (8 colors) to 24bit (16M colors).
- distance visibility of gap between pixels.
- distance visibility of RGB pattern.
and, on softimage : dead pixels, non uniform color chunks and some other picture degradations.
This Shader need a raw image data, without UV. So, in softimage :
* you need to connect blue output of the raw image node to the shader, without the 'image' node.
in Blender :
* There is no 'raw image file' node, so you need to enter, by hand, the full path of the image file of the image you want to pixelize of for the RGB pattern image.
I offer you a bunch of RGB Patterns examples. I made photgrphies of many screens using my 60mm Macro Nikkor, and I draw some myself.
See the FULL Documentation (in french, sorry) for more information.
Here is my Stereography / stereoscopy Reel for this year.
It shows the last version of my Stereo Rig for Autodesk Softimage, and some works done with it.
There are two cut for this reel, one with technical facts first, the other one with stereo production first. So, you can choose which one you prefer to see :
J’ai réalisé dernièrement une auto-formation sur MentalRay avec 3DS Max concernant les bases des matériaux. Elle est faite pour exploiter au mieux Mental Ray et en connaître toutes les fonctionnalités.
Cette formation se base largement sur mes cours et tout ce que j’essaye d’y mettre. Elle reprend les notions de base, pour les clarifier et surtout détruire les mauvaises habitudes. Elle va aussi plus en profondeur et explore les nombreuses fonctions des matériaux qui sont peu ou pas connus malgré leur intérêt indéniable. Enfin il y a pas mal de cas concrets qui permettent de mettre en application tout ça et de connaître encore d’autres subtilités.
Enfin j’y ai rajouté quelques pistes pour adapter cette formation à Softimage et Maya.
Voici le programme : - Les Bases
- Les Matériaux Réels
- Projet : Nos nouveaux Locaux
- Fresnel et l’incidence
- Projet : La Caisse à Outils
- Transparences Avancées
- Peintures Vernies
- Les Métaux et le reste
- Projet : Poste de Télévision Portable
- Projet : Le Bureau de l’Infographiste
Juste pour les amateurs de chiffres, pour enseigner tout ça en cours, il me faut au moins 30 à 40 heures. Et pensez que chacune doit leçon doit être suivi d’une pratique, et n’oubliez pas de répondre aux QCM pour valider vos connaissances !
N’hésitez pas à le commander ! En plus, il est tout à fait accessible (surtout comparé à ce type de formation en général...) : Formation MentalRay, Les Matériaux !
P.S.: Les ventes permettront aussi de supporter ce blog...
Voici une petite démo qui résume ce que j’ai fait sur le projet de court-métrage ‘Sweet Suicide Cook’. Bien évidement, elle ne montre pas tout ! C’est juste une mise en bouche, pour vous mettre en appétit et vous donnez un petit aperçu de l’envers du décor.
J’espère réaliser d’autres vidéos, plus détaillées, pour mieux expliquer le travail réalisé.
This is my Stereography Demo. It shows some Stereoscopy ‘Hard Cases’ and show my way to handle them. There is also some grabs of my Autodesk Softimage Stereo Rig.
Of course, I would like to show more, but it has to be short. Just contact me for more!
Coating is really usual in real life. Indeed, it is more unusual in 3D world! Color obtained by coating is a mix of the color of coat and interferences of wavelength, so it’s not so easy to render. I made the choice of simulating and not spectral rendering. It’s easier, faster, and with more artistic controls!
So here is my ‘Add Coating’ Shader Compound for Autodesk Softimage 2011!
It is made for adding nearly any kind of coating! With this compound, you can do: Colored glaze and varnish, Antireflect and optical coatings on lens, Oily Irisation, Rainbow or color changing glaze… And so many things!
This ‘Add Coating’ is not made to render real simulation of interference coating. It is made to have a full artistic control over the result. So, you don’t have to know how much thickness should have the coating according to wavelength… Just choose how many rainbows you want and color shift, and you’ll have a nice coated effect!
The shader Compound is easy to use: First, do your material as usual, using all what you want in your render tree (architectural, phong, complex tree, Gem Dispersion Shader Compound, etc…). Second, plug your material in the ‘Base material’ input of the ‘Add Coating’ Shader compound, and plug its output to ‘surface’. Voilà! You have coated your material! Third, play with the many option of the coat to have the desired effect.
This Shader Compound is made for Educational Purpose Only, and it is fully commented. Have a look inside it!
You can also use it ‘as is’ if you need to add some coating.
If you make some pictures with this shader compound, please, don’t forget credits and send me your results. If you have any suggestion for making this compound better, just send me an email!
Quick documentation: Input: Base Material: this color is not intended to be use as a color. It’s where you have to plug your uncoated material to add coating to it. Exaggerate effect: you can make effect more or less visible, more or less exaggerated. Less than one is more correct. Good value is around 0.5. Disable Coating: switch off the effect of the Shader Compound. It turns it to be just a pass-through. It’s useful if you want to make passes without coating.
Interferences: Spectral cycles: the number of ‘rainbow’ seen in the coating. Less than one is nice for real coating look, more than one will make a more rainbow effect on object. Spectral Offset: the way to choose the color of coating you want. Cycle spectral colors to have the one you want at the place you want. It’s just a rainbow color sliding. Saturation: you can desaturate coating here. When saturation is close or equal to zero, coating is acting like polish on material.
Attenuation: Fresnel attenuation: at 0, the effect of coating is visible on the entire object, like a lens coating. At 1, just the edges of the material are colored, more like standard coating or colored coating. Absorption: because of conservation of energy, coating is hiding base material. Absorption makes edges of the object darker (making coating more visible). It is nice to have a ‘deep’ effect on object.
Diffuse Coating: Light sensibility: Some coatings are reflective and diffusive. Zero means no diffuse, 1 means full diffuse. This is useful for colored and thick coating. It helps also to make coating more visible in case of too few things around to be reflected. Hardness: diffuse can be real local (light facing diffuse) or on all object. 0 means diffuse is visible on entire object. Use Tint color: diffuse color is the one of ‘tinted coating’, like pigment include in glaze or coating. It’s the most common case.
Tinted Coating: Tinted coating: when on, rainbow colors are filtered by the color of tint. It’s a filter color, not a pigment color. Tint color: the color of tint, or filter color of coating.
Optimisation (for transparent base): If you plug a transparent material in base material, coating could be very slow because of rendering inside the object in internal and total reflection. When you switch on this option, coating is rendered just on external reflection of object, making it really faster. It is useful just on transparent base material. I do not recommend it on non transparent object.
Noise: Noise intensity: you can make rainbow effect more or less noisy. 0 means no noise (default), with perfect rainbow, 1 or more means disturbed coating, like oil. Noise scale: to adapt the size of noise pattern. The smallest is the scale, the biggest is the pattern. Use external noise and External noise input: Disable the internal compound noise and take the scalar input as new noise. If you want a more controlled noise (like a logo on your coating…), you can override the internal noise and branch the shader you want here.
Multiple Outputs: The Add coating compound has multiple outputs. It is useful for another kind of usage. Instead of using a base material, you can plug the multiple outputs in your material. For example, connect the ‘reflect color’ to your reflection color, multiply your diffuse color by absorption. On some object, the result will be the same, on other, it would do different effects.
To do: For next versions, I plan to include a pigment color, acting as a real filter on object. Actually, tinted color does not affect object color. Also, I’ll add coating specular. Actually, it just add reflect, without specular. With specular and pigment, it would be possible to emulate thick varnish and glaze. Multiple coating is actually possible by plugin AddCoating in another AddCoating. I’ll try to make a smarter (and faster) way to do it. If you have any other idea or need, just ask me!
I’ve worked on optimization of the Gem Compound Shader.
In the previous version, each ray were rendered 3 times, for R,G and B. It is needed for real accurate dispersion, but it is slow. And even slower when real reflections are added. But we don’t need such accuracy every time. Often, just a good visual effect is needed. So, here is a new version of Gem Shader Compound.
You now have the choice between 3 level of accuracy (and speed) of dispersion. The rendering time is dramatically speeded up! You can even add reflections and still have a faster rendering time than previous version.
I also added a ‘no dispersion’ option, so you can go even faster if you don’t need dispersion at a time.
This Compound shader is still released for Educational Purpose and is fully commented. You can watch and read how I optimized it to try to get your own compounds faster. If you just want to use it for production, email me first, please.
Quick documentation: Gem: Transp Color: The color of the Gem. It should stay not saturated. If you use too much saturated color, you would not see any dispersion effect.
IOR: Base Index of refraction of the Gem. Gems usually have strong IoR, between 1.8 to 2.42.
Dispersion: the variation of IoR between Red and Blue. The stronger this number, the stronger is the effect. I recommend to stay below 0.15.
Metal Gem: when On, the reflection is colored by the Transp Color, giving a metallic look. This effect is not physical, and there is no metal gem in real world. Indeed, the effect is interesting.
Pass: External Reflection Only: when On, the output returns an alpha ready reflection on external surface of the gem. No transparence is rendering neither ‘total inside reflection’. If you want to composite reflection, you have to make a pass with ‘External Reflection Only’ ON and another OFF.
Accuracy / Speed: Accuracy: You have 4 ways to render dispersion, from slower to faster: Full dispersion: it’s the one in the first version of the compound, the slowest one. Minus back: faster, but secondary dispersion on total reflection is not rendered. I recommend ‘Minus Back’, which is fast and good enough for most usages. Front only: just the dispersion of the front surface is rendered. It is really faster, and on very complex objects, the difference is not so visible. No dispersion: No dispersion is rendered! So the Shader is doing usual glass, as other Mental Ray Shaders. It is faster than any dispersion and can be useful if dispersion isn’t needed for a scene…
External reflection Added: Add the External Reflection, but do not render Total Reflection. It is fast enough to be used with any Accuracy.
Full reflection added: Do complete rendering, with Transparency, External, internal and Total reflection. It is the slowest and the most accurate rendering of dispersion. Indeed, it is fast enough to be used with ‘Minus back’ and ‘Front Only’. Using it with Full dispersion can be very very slow and is ok just with very powerful rendering machine.
Usually, on simple objects, you should use the shader compound (few polygons gems) with Full dispersion and External Reflection. For very complex object, Front only and External Reflection is fast and nice. I strongly recommend to try different accuracies to see what is the best rendering time / accuracy for your need.
One of the first things we can notice while watching Gems, is that they have high dispersive effect. Dispersion is due to the difference of Index of Refraction between colors, so there is a nice rainbow effect!
A friend tried to have this effect for a gem animation. It’s not so easy, because nothing in Autodesk Softimage let you do it. So, I’ve made this shader compound. It’s just RGB dispersion, with different IoR for R, G, and B. It’s not really fast, but it was enough for the need, and the animation was made!
Although there is no spectral rendering, it’s enough to have a cool visual effect. In fact, it is nice enough to be used in most case, when just the effect is needed, and not spectral accuracy.
As the result is interesting, I decided to release it as Educational Material. It is fully commented, ready to use and to be modified. Open the compound, and play with it!
Note about how to use Gem_Dispersion: By default, the compound renders just the transparent part of material, without any reflection on surface. If you want to have reflects, I strongly recommend you to make a new pass with ‘External Reflection Only’ override to ‘On’. Then, simply alpha blend this pass with the one with transp. The ‘External Reflect Added’ is terribly slow, and I don’t recommend it. This need to be debugged…
If you make some pictures with this shader compound, please, don’t forget credits and send me your results. If you have any question about this compound, just send me an email!
Quick documentation: Transp Color: The color of the Gem. It should stay not saturated. If you use too much saturated color, you would not see any dispersion effect.
IOR: Base Index of refraction of the Gem. Gems usually have strong IoR, between 1.8 to 2.42.
Dispersion: the variation of IoR between Red and Blue. The stronger this number, the stronger is the effect. I recommend to stay below 0.15.
External Reflection Only: when On, the output returns an alpha ready reflection on external surface of the gem. No transparence is rendering.
External reflection Added: Do complete rendering, with transparence and external reflection. Warning, it is very slow!
Metal Gem: when On, the reflection is colored by the Transp Color, giving a metallic look. This effect is not physical, and there is no metal gem in real world. Indeed, the effect is interesting.
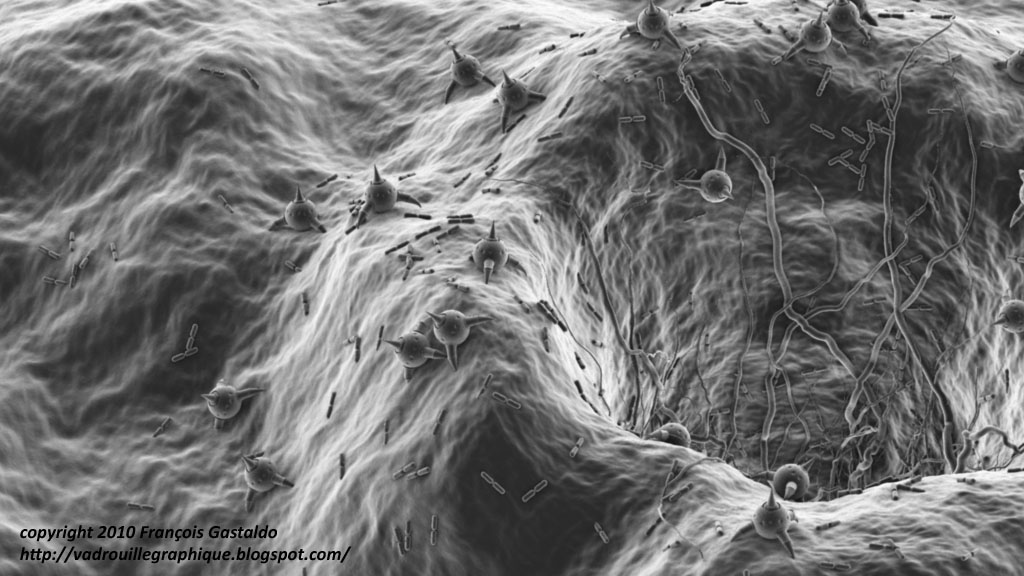
Do you like nanotechnologies or microscopy biology? What I really like is the look of those wonderful Electron Microscope images showing the nanoworld. There are noisy, strangely lighted, and seem to be from another world, strange and frightening…
So, I’ve made a shader compound for Autodesk Softimage 2011. The main interest of this compound is, of course, to simulate the electron microscope look, but also to show how to make it ready for passes, compositing, and easy to use.
This Shader Compound is made for Educational purpose, and it is fully commented. It’s really easy to make Electron Microscope look. It’s simply an incidence and an ambient occlusion. But to make this usable and adaptable is not so easy. That’s the goal of this compound. Have a look inside it!
You can also use it ‘as is’ if you need to make some nanopictures.
If you make some pictures with this shader compound, please, don’t forget credits and send me your results. If you have any suggestion for making this compound better, just send me an email!
Quick documentation: Base lighting: Light softness: how hard is the ‘lighting’ from electrons. Less softness is a more contrasted picture. Shadowing distance: contact shadow size, or how far elements are obscuring each other. Structured noise: Some electron microscope pictures are often noisy. From ‘very noisy’ to ‘extreme softness’, this function added structured noise to your picture, base on lighting. The less noise you have, the slower you are!
Color: Real Electron Microscope images are black and white. Some of them are colored by post-processing. You can have this ‘colorized look’ by using this color, or switch of colorization and keep original black and white.
Bumpy Noise: At nano scale, nothing is really flat. So this compound adds bumpy noise on object. Disable Noise: doesn’t add noise and keep object perfectly flat. Animated noise: if you choose a very small noise, you can animate it to have a more ‘rough’ picture effect during animation. Don’t use it with large noise! Noise level: height of the noise. It should stay very small to keep ‘non flat’ effects. Noise Scale: Size of features of noise. The smaller it is, the biggest are the features.
Bump: If you want to add your own bump to your objet.
Pass generation: Here are switches for extracting one particular feature of the shader compound: Total compound is ‘Color * Gradient * Ambient Occlusion’. You should have just one of them switch on, or none of them. If you switch two, you’ll have to topmost one.
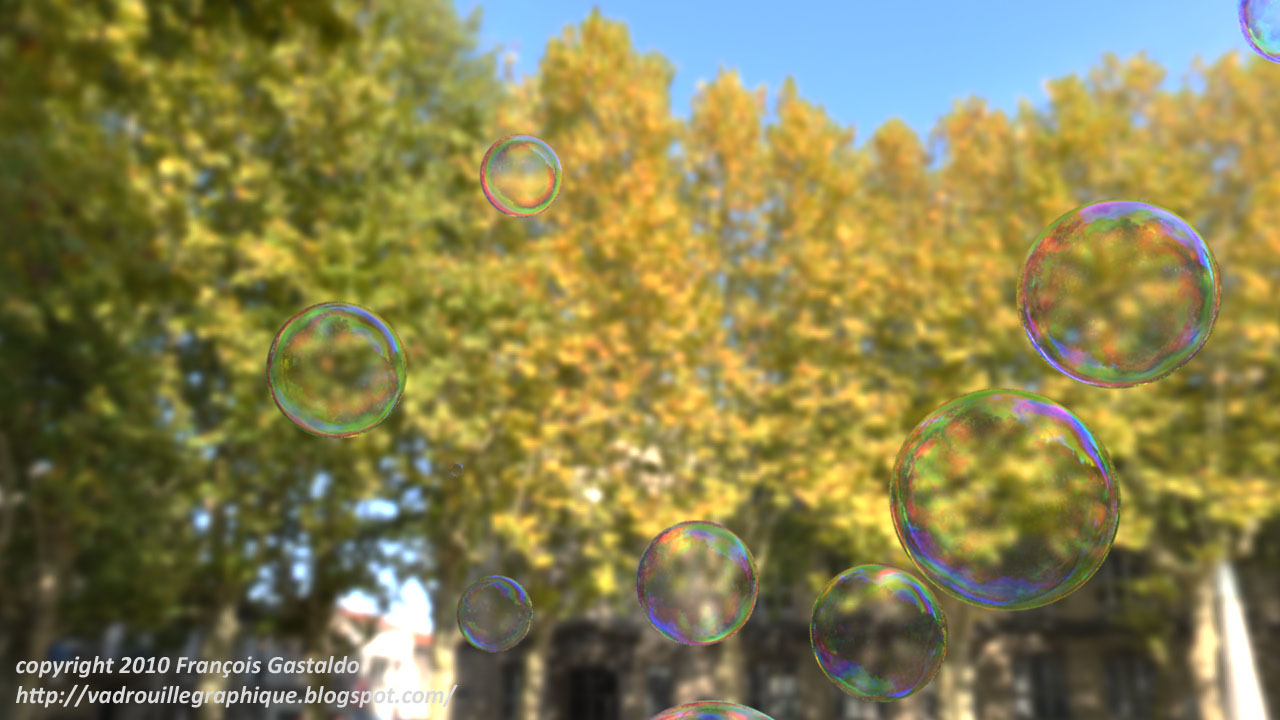
Bubbles are really simple to do. A little bit of soap, some water, and voilà! Unfortunately, it’s not so easy in 3D. Bubbles are so thin that light is interfering and a lot of colors are visible. But interference colors are not rendered by MentalRay… So I’ve made this Bubble Shader Compound for Autodesk Softimage 2011! It renders very well on spherical ICE particles.
Bubbles are visible just because there is an environment. They are mix of transparency and reflections. To see bubbles, you have to connect an environment shader or have one plugged in your pass. To have bubbles render fast, you must have a low number of reflection rays (2 to 4 is enough), the number of refraction rays depends on the numbers of superposed bubbles in your picture.
This Shader Compound is made for Educational purpose, and it is fully commented. It is a full complex render-tree material, with a lot of nodes. To make it as a compound is the only way for make it usable. Have a look inside it!
It is not a real interference color rendering, it’s just a simulation. The goal is to allow full control to artist, without physical consideration.
If you make some pictures with this shader compound, please, don’t forget credits and send me your results. If you have any suggestion for making this compound better, just send me an email!
Quick documentation: Effects: Exaggerate effect: you can make effect more or less visible, more or less exaggerated. Less than one is more correct. Color transparency: usually, bubbles are not filters, transparent color is not affected. But sometimes, depending of your environment, reflect color could not be enough to see well the bubble. You can try ‘color affect transparency’ in those cases.
Interferences: Spectral cycles: the number of ‘rainbow’ seen in the bubble. Usually more than one... Spectral Offset: if you want to have the color you want on the bubble, you can cycle spectral color to have the one you want at the place you want. It’s just a rainbow color sliding. Saturation: If you find the bubble too colored, you can desaturate it here. Fresnel attenuation: at 0, all the bubble is colored and reflective, at 1, just the edge of the bubble are colored (more realistic).
Noise: Noise intensity: you can make the bubble more or less noisy. 0 means no noise, with perfect rainbow, 1 or more mean disturbed bubble. Noise scale: to adapt the noise pattern to the size of your bubbles. The smallest is the scale, the biggest is the pattern. Use external noise and External noise input: Disable the internal compound noise and take the scalar input as new noise. If you want a more controlled noise (like a logo on your bubble…), you can override the internal noise and branch the shader you want here.
Voilà une bonne nouvelle. Bon, le délai est un peu court : il faut rendre le film le 9 Juillet.
A moins d'avoir déjà un film, et de le passer en stéréscopie, je ne vois pas trop comment faire. Donc, à tous ceux qui ont un film, ou qui ont en fait un l'année dernière... HOP ! AU BOULOT !! Je suis prêt à vous aider si vous me le demandez !
La cerise sur le gateau,c'est que sony fourni gratuitement des tutoriaux pour faire de la stéréoscopie avec tous les logiciels 3D majeurs du marché ! Il y a même des rigs stereoscopy à télécharger pour Autodesk Softimage (et XSI...).
Avec l’adaptation pour Softimage 2011, j’en ai profité rajouter une nouvelle fonction : la décorrélation du Plan de zéro parallaxe et de la distance de convergence.
L’utilisation n’a pas changé, le Rig s’utilise toujours comme une caméra standard Softimage.
Voici une photo de l’interface et une petite vidéo de ma scène de test de matériaux et d’illustration de cours en 3D anaglyphe.
The new version of my Stereoscopy Rig for XSI / Autodesk Softimage 2011 is here !
From the first version, I made a lot of changes. I’ve include Focal Compensation, Visual helps, use of direct anaglyph plugin, and so on… You can see here the first post.
With the adaptation to Softimage 2011, I add a new functionality : convergence point can be different from parallax point.
The basic use of the Rig didn’t change. You can still use it as a standard Softimage Camera.
Here is a picture of the new interface and a test video using my demonstration scene for materials.
Dimanche dernier, nous avons fait un petit repérage de lieux abandonnés pour un projet de court-métrage.
Ces endroits, fantômes d’une époque révolue, sont une mine d’or tant pour le photographe que pour l’infographiste. On a pris un véritable plaisir à remplir la carte mémoire jusqu’à plus soif ! Ces photos feront l’objet de plus posts dans ce blog. Il y a une montagne de tri devant nous !
Mais cette sortie a aussi été l’occasion de réaliser des environnements HDR 360° en haute définition (11500 x 5750 pixels).
Et comme le court-métrage a besoin d’un drone de reconnaissance surnommé ‘La Mouche à Merde’, l’occasion était trop belle d’essayer l’objet 3D dans un de ces environnements !
Voici donc le drone ‘Mouche AM’ dans un magnifique Hangar. C’est du Brut XSI, sans vrai compositing. Le but n’était pas de faire une méga animation parfaite, mais de valider les éléments qui seront ensuite utilisés dans le film avec un éclairage et un compositing / FX adapté aux plans.
Tout d’abord, ma photo de mouche que a servi de référence pour les matériaux du drone :
L’aspect métallique a été doublé d’un motif de camouflage pour l’objet 3D et les couleurs ont virés du coté militaire pour renforcer l’aspect ‘Drone’.